Getting to know the signs of overwatering and underwatering (and what to do about it) will help you strike the right balance in you green wall - leading to a lush, healthy display.
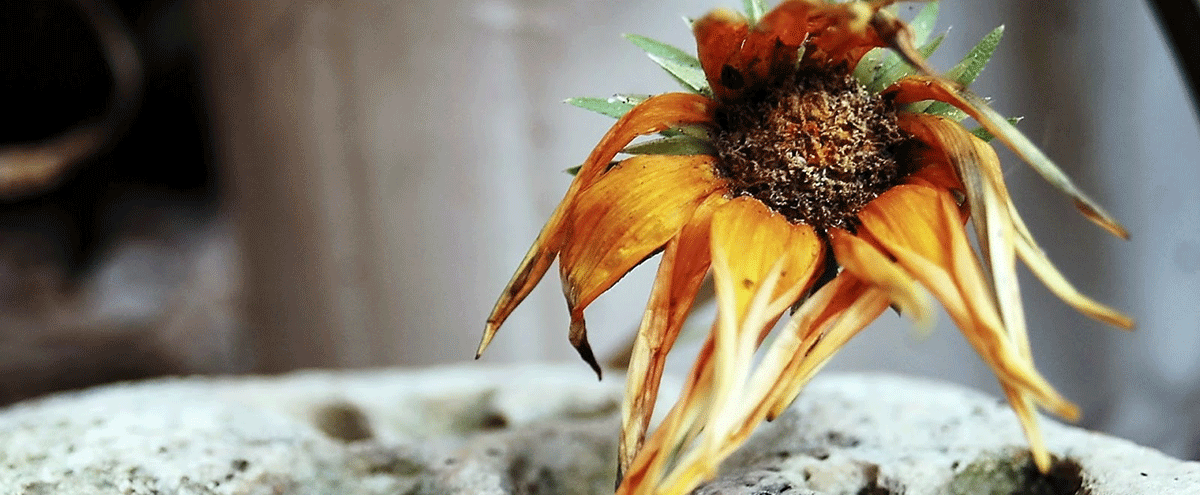
The biggest risk you face with potted plants (both indoors and outdoors) is overwatering. Overwatering causes plants to drown from lack of oxygen, or suffer from root rot and fungus because they can’t dry out properly. Sometimes, however, in our attempts to avoid overwatering, we end up overcompensating and not giving our plants enough water. Underwatering is equally detrimental to your plants’ health.
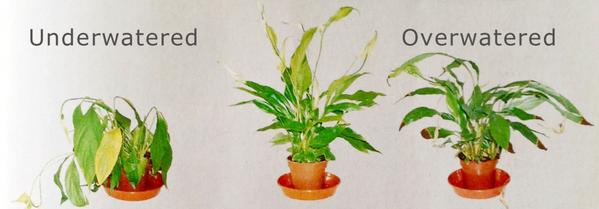
Image source: Binley Florist
Here’s a comprehensive guide to help you spot the signs of these two common watering mistakes (and resolve the problem before it kills your plants).
THE ROLE OF PROPER DRAINAGE IN YOUR VERTICAL GARDEN
According to the Missouri Botanical Gardens, “Over watering is one of the more common causes of plant problems. The dying roots decay and cannot supply the plants with nutrients and water. Damage caused by overwatering is frequently misdiagnosed as pest damage.”
Drainage is one of the most important parts of your vertical garden. If your system can’t drain properly, you’ll face a constant battle when it comes to perfecting your watering routine. In addition to being bad for your plants, if your system is indoors you run the risk of pots overflowing, leading to spillage and mess.
The best way to avoid overwatering is to choose a system with irrigation which mimics nature’s “flood” methodology: a sudden deluge of water, with a period to dry off afterwards, instead of constant moisture. However, if you’re going to be watering your green wall manually, make sure that you choose a pot system with sufficient drainage.
If you have an existing pot system, and you notice your pots aren’t draining well, you can always drill additional holes in the bottom of each container. Whether you’re working with regular, ground-based cement pots or a green wall, adding some extra drainage holes can save you a lot of money replacing plants if they’re dying because of poor drainage.
SIGNS YOUR PLANTS ARE BEING OVERWATERED:
- Leaves wilt and drop off despite the soil being wet
- Yellowing leaves
- Leaf scorch, or leaf burn
- Water soaked spots and blisters (oedema). Explains Home Guides, “When the roots of over-watered plants absorb water faster than the plant can use it, the water pressure begins to build in internal cells. The cells will burst, killing them and forming blister-like areas, generally on the undersides of the foliage.”
- Soft, mushy stem base or rotting roots
- Visible fungus or mold forming on top of the soil
- Unusually foul smell emanating from the soil
SIGNS YOUR PLANTS ARE BEING UNDERWATERED:
- Stunted, slow growth
- Brown, dry or curling leaf edges
- Flowering plants fail to produce blossoms
- Brittle, crisp stems
MOISTURE TESTING:
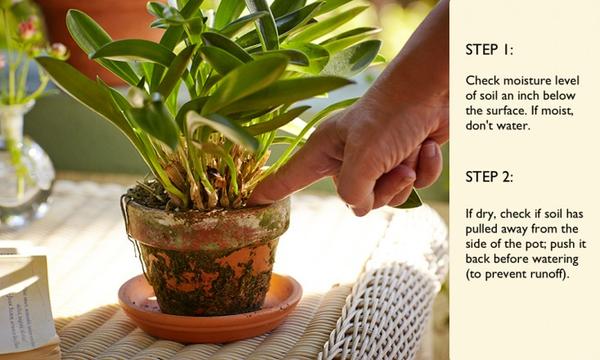
Image source: Gardenista
Before you water your plants, it’s important to check that the soil is actually dry. If it’s still damp, you shouldn’t water them just yet.
While many tools are available to help you test the moisture in your pots, the quickest way to find out if your plants need water, is by sticking your finger in the soil, approximately an inch or so deep. The soil should feel cool and damp - if you can feel a lot of water, you’ll need to drain the pot.
Note: outdoor plants in pots require more frequent watering than indoor plants as the sun’s heat dries out the soil faster than it would indoors. Home Guides recommends checking the moisture levels of your outdoor potted plants daily (or a minimum of twice per week) whereas indoor plants can be checked once per week.
If you’ve overwatered your plants, Home Guides shares some steps you can take to correct the problem:
- -Lift the plant out of the pot gently. Turn the pot on its side and slide the plant out gently to minimize damage to the root system.
- -Work as much soil from the roots as possible with your fingers, taking care not to break the roots.
- -Cut off any overly soft, rotten roots with clean shears. Remove any roots that appear dead or are badly damaged.
- -Fill a new clean pot a third full with pasteurized potting soil. Use a pot the same size as the old one that has at least one bottom drainage hole.
- -Set the plant in the pot, spreading the roots out over the soil. Adjust the depth of soil beneath the roots so the top of the root ball sits 1 inch beneath the pot rim.
- -Add soil to the pot until the plant is at the same depth it was growing at previously. The crown of the plant where the stems emerge from the roots must sit even with the soil surface.
- -Water the soil lightly to settle it. Keep the soil slightly moist. Empty the drainage tray after watering so the soil doesn't absorb the excess moisture.
Getting the watering balance right when it comes to potted plants can be challenging. If you’re a first timer or don’t really have a green thumb, it’s a good idea to choose a simple system that’s easy to maintain and does most of the work for you.
Choosing the right system from the start will ultimately save you hundreds of Dollars replacing dead or dying plants, and lower your overall cost of green wall ownership. You’ll also have the added benefit of a lush, healthy display to wow your visitors.


![3 Signs Your Greenwall is in Trouble [And What To Do About It]](https://blog.growup.green/hubfs/7%20common%20maintenance%20mistakes%20in%20indoor%20green%20walls.png)
