Here’s a step by step guide showing you how to install your GrowUp green wall system. The simple, fast and effective way to start growing vertically.
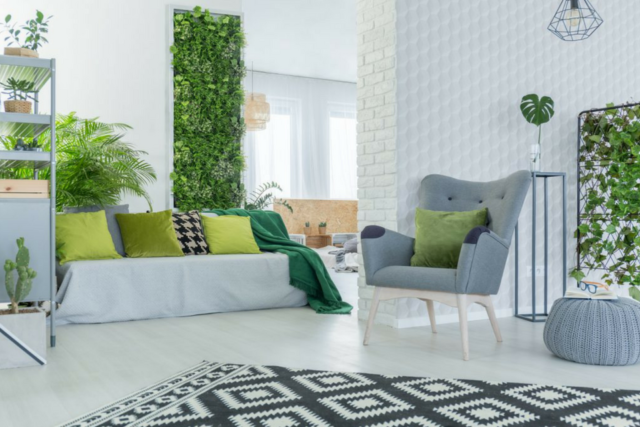
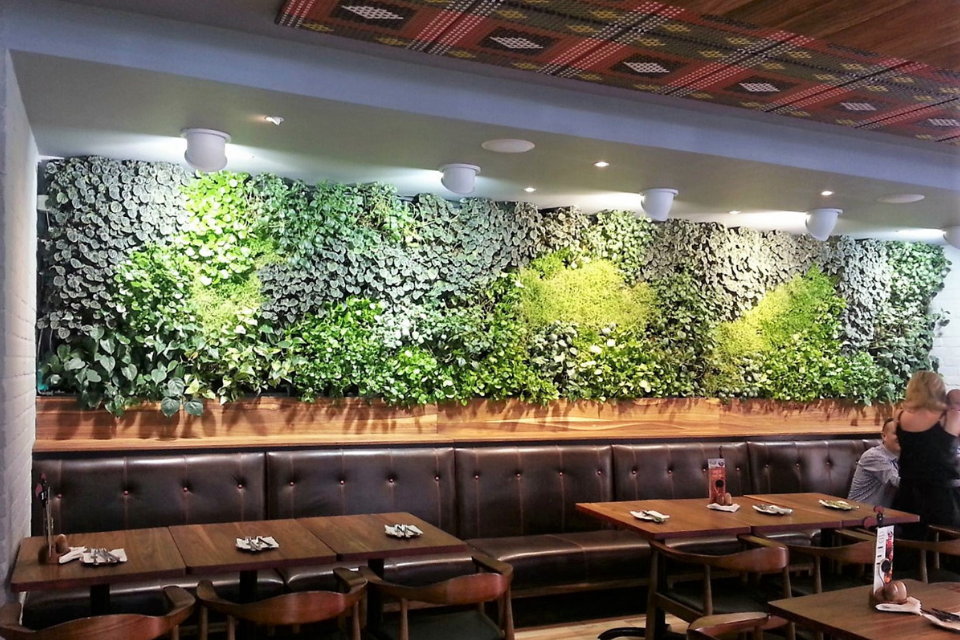
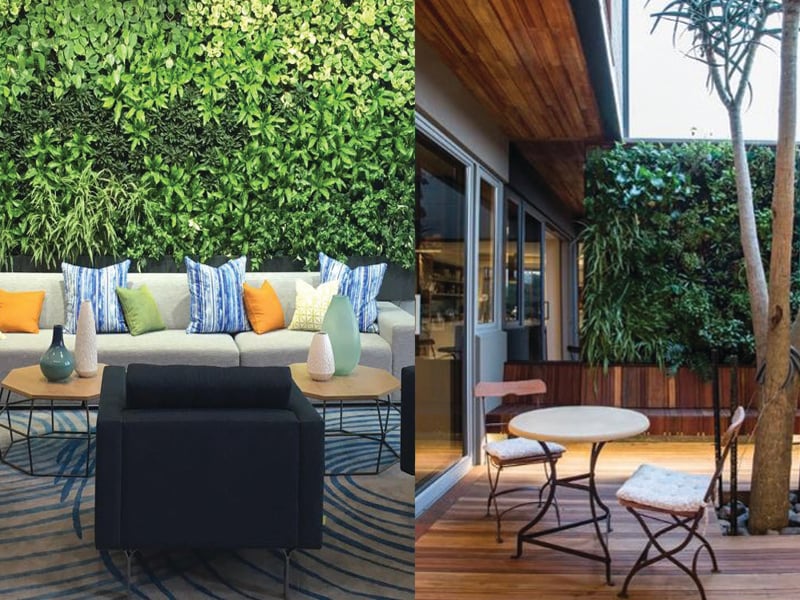
Green walls are a fantastic way to breathe life into a dull space. Whether you’re planting decorative or edible plants, living walls are unique and aesthetically pleasing. The GrowUp green wall system is a hassle-free system which, unlike other vertical gardens, doesn’t require an extensive understanding of things like hydroponics.
Our system is designed to be as simple as possible - so that the whole family (both young and old) can get involved in creating living art.
GROWUP SYSTEM HARDWARE OVERVIEW
The GrowUp green wall system can be tailored to fit any space. Our range starts with a five pot kit and you can add as many pots as you need to fit the space where you plan to install the living wall. The system comprises of the following components:
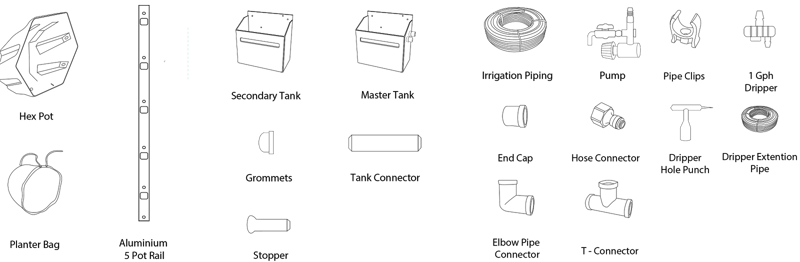
The cleverly designed hexagonal pots fit together to create a honeycomb pattern which ensures that your vertical garden looks full and lush right from the start. One of the key benefits of the honeycomb design is that you won’t be left with bulky, unattractive hardware peeking out between your plants.
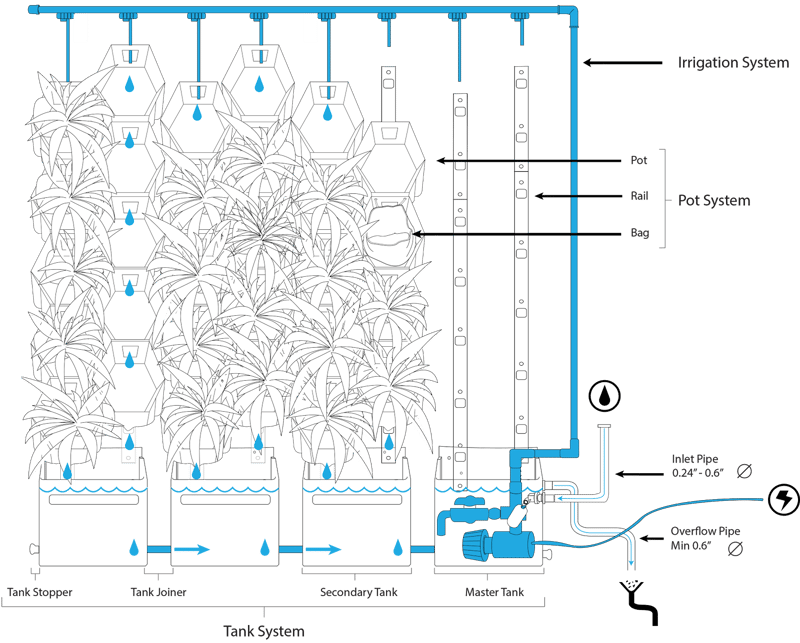
The result? A stunning green wall display that works beautifully both indoors and outside
Tools you’ll need to assemble your green wall

HOW TO INSTALL YOUR GREEN WALL [A STEP BY STEP TUTORIAL]
You don’t need to feel overwhelmed by all the bits and pieces, putting your green wall together is as simple as counting to fifteen.
Step 1 | Mounting the master tank
Install master tank level in bottom right corner of the wall.
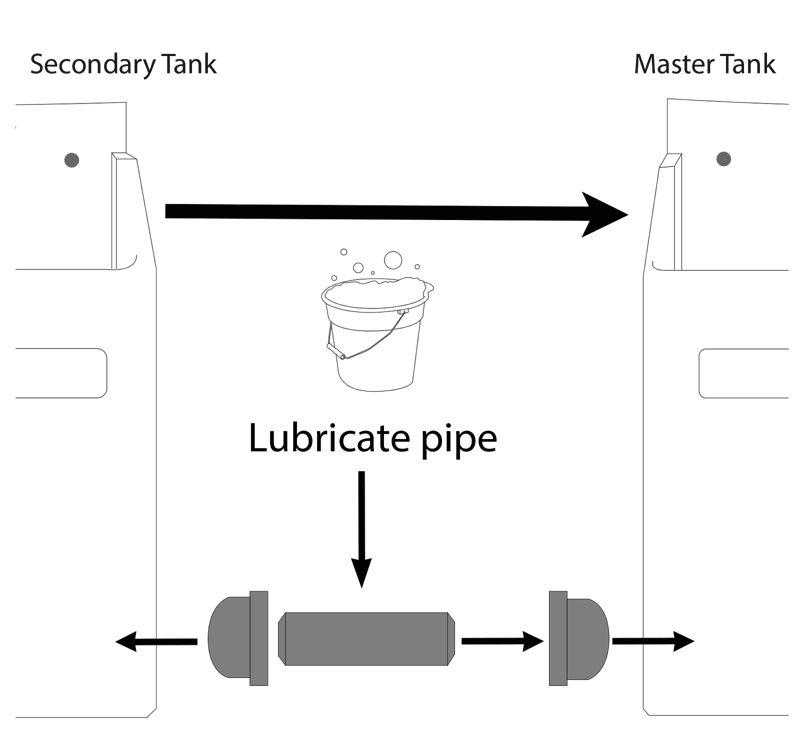
Step 2 | Joining Tanks
Insert the grommets and push them through the connector pipe to join the tanks.
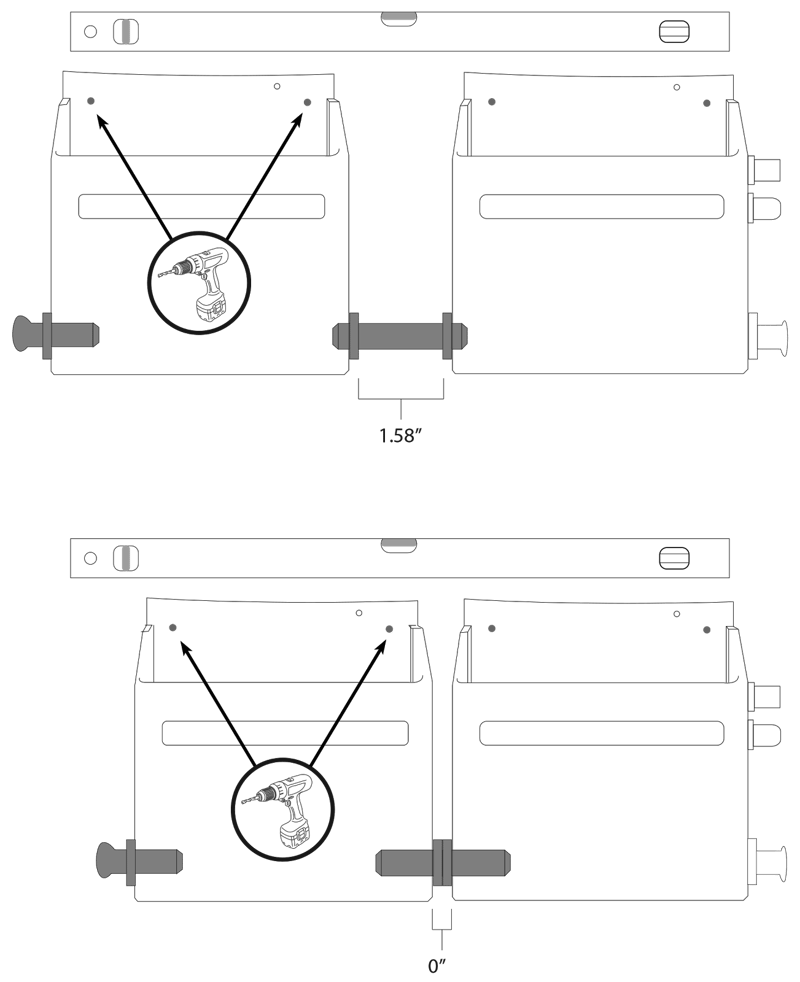
Step 3 | Mounting the secondary tank
Set the spacing between the tanks to between 0”- 1.58” to adjust the width of the system. Install the tanks level with each other and insert the stopper on the last tank.
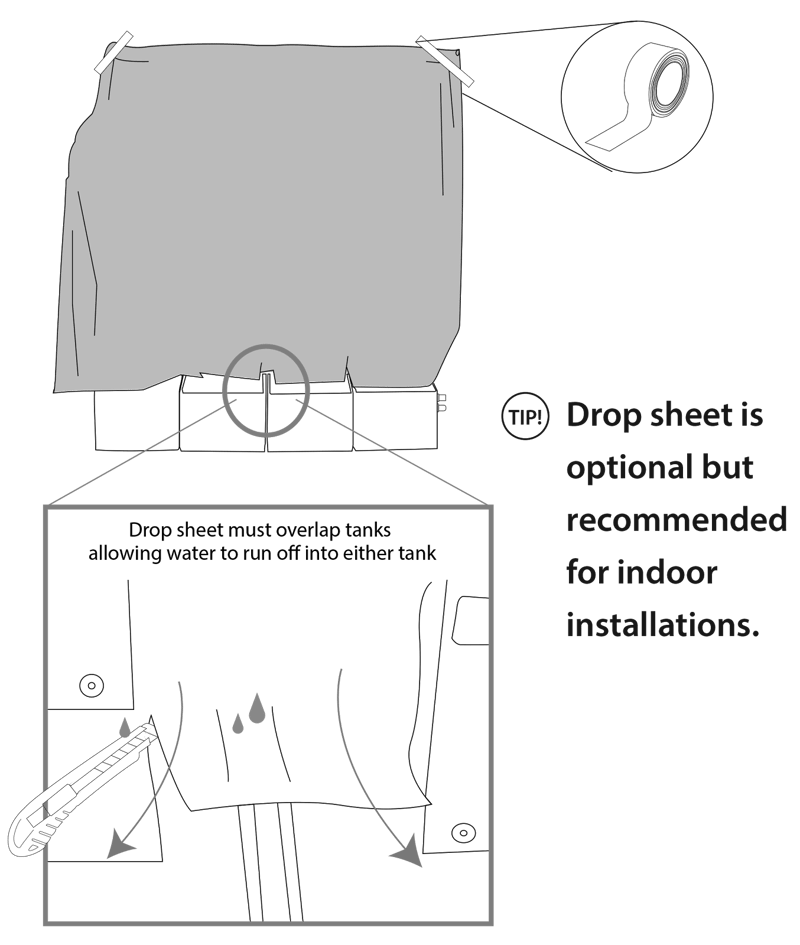
Step 4 | Install the drop sheet (optional)
The drop sheet redirects water that escapes the pots due to installation or maintenance errors.
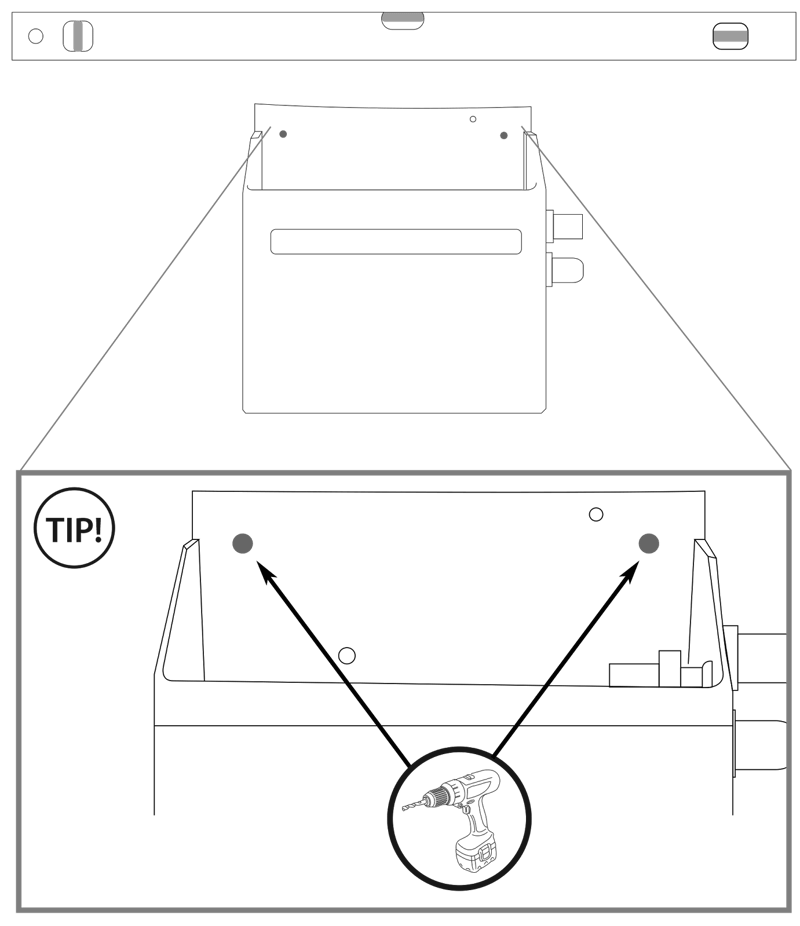
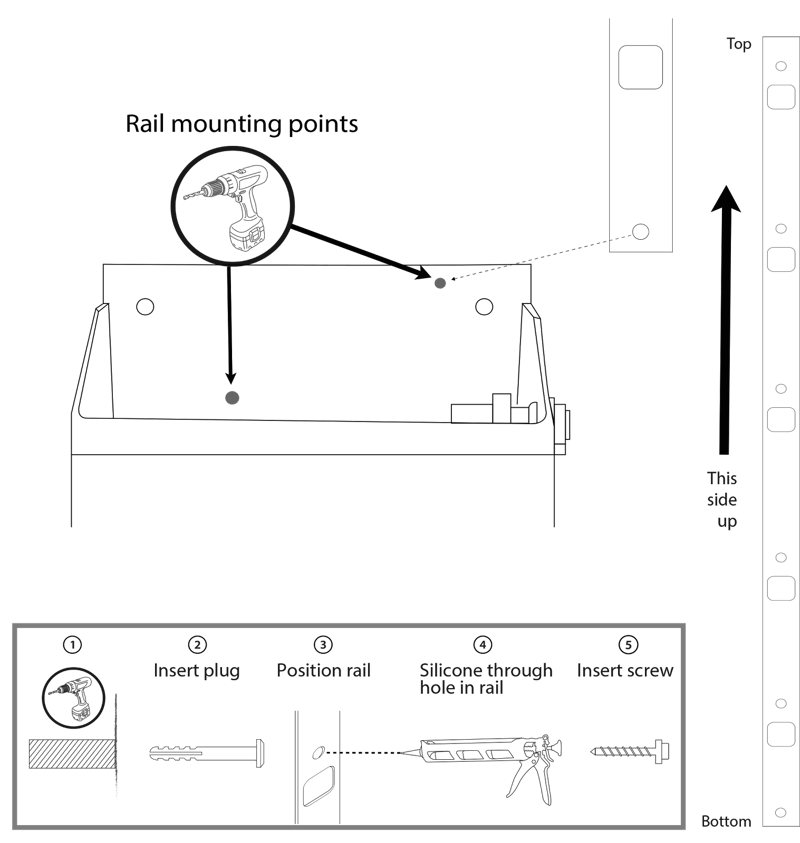
Step 5 | Attach the rails to the tanks
Use the pilot holes provided on the tanks to install the bottom screw on each rail.
Step 6 | Level the rails and secure them
Level the rails and install the top screw on each of them.
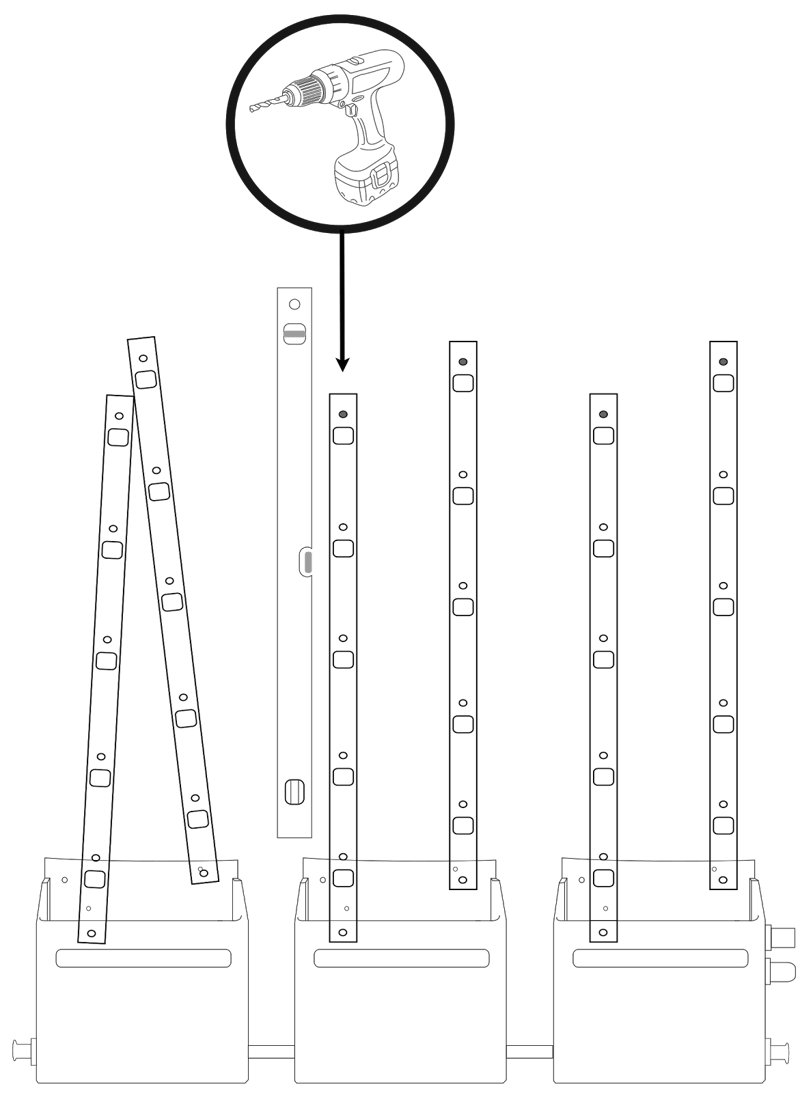
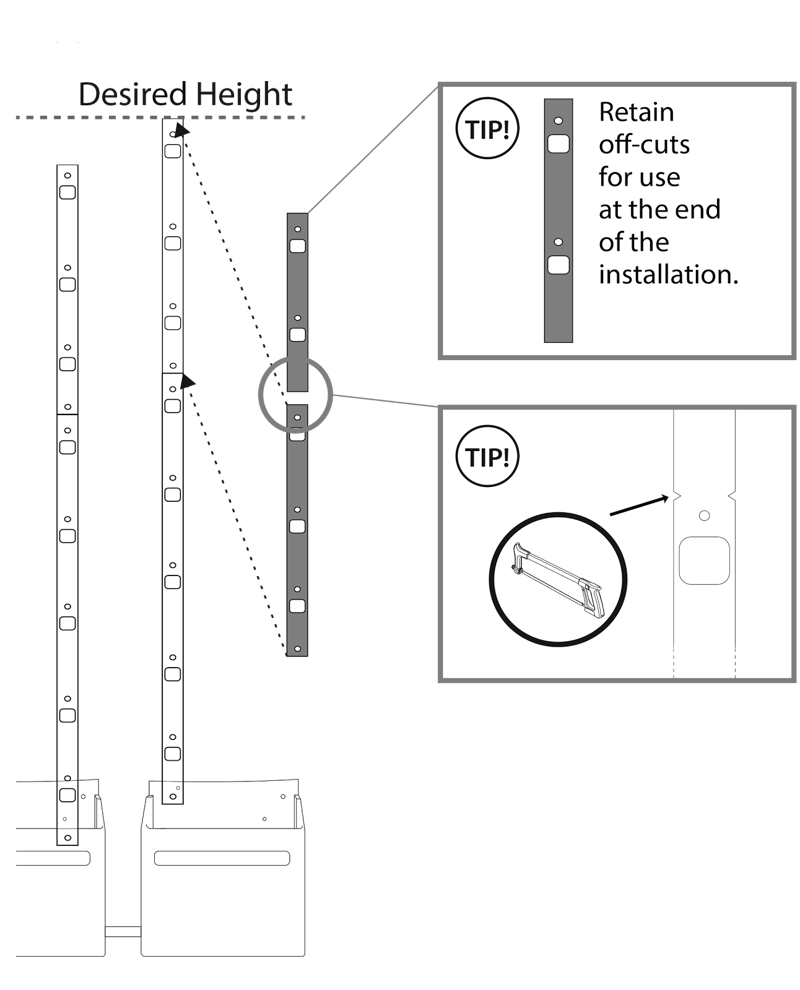
Step 7 | Stack and cut the rails
Cut the rails on notches provided, to your desired height.
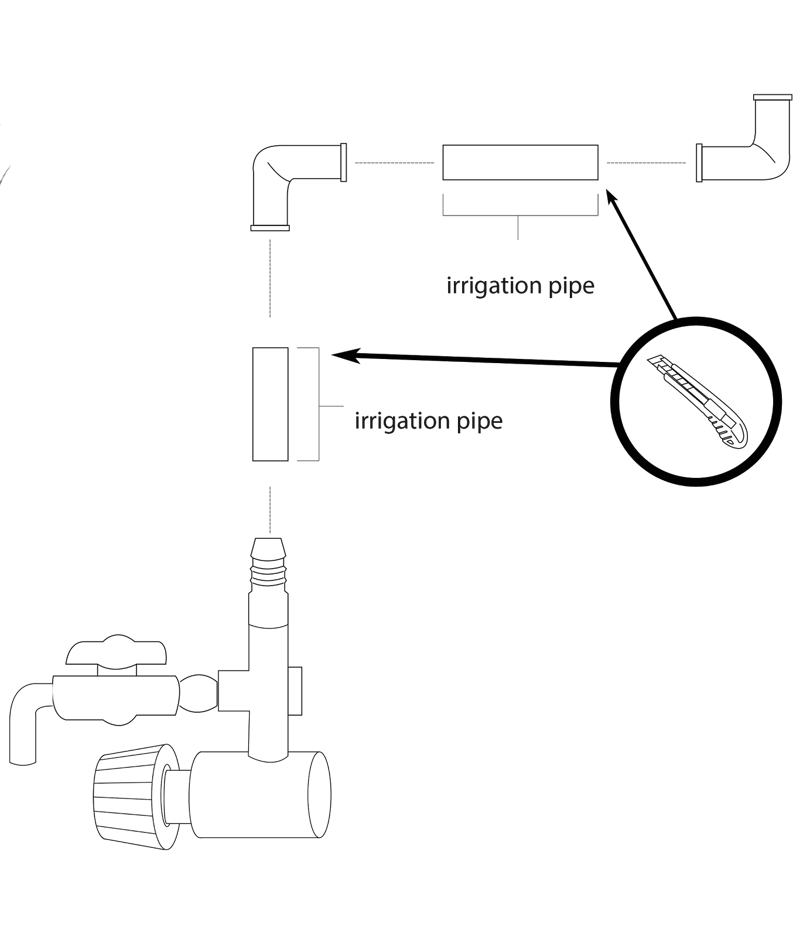
Step 8 | Pump assembly
Attach the first section of the irrigation pipe to the pump as shown below.
Step 9 | Pump Installation
Place the assembled pump into the master tank, then place the irrigation pipe through the notch provided in the master tank.

Step 10 | Install irrigation pipe
Install the irrigation pipe using the supplied cable ties to secure to the wall. Use the pipe connectors provided to join the pipes.
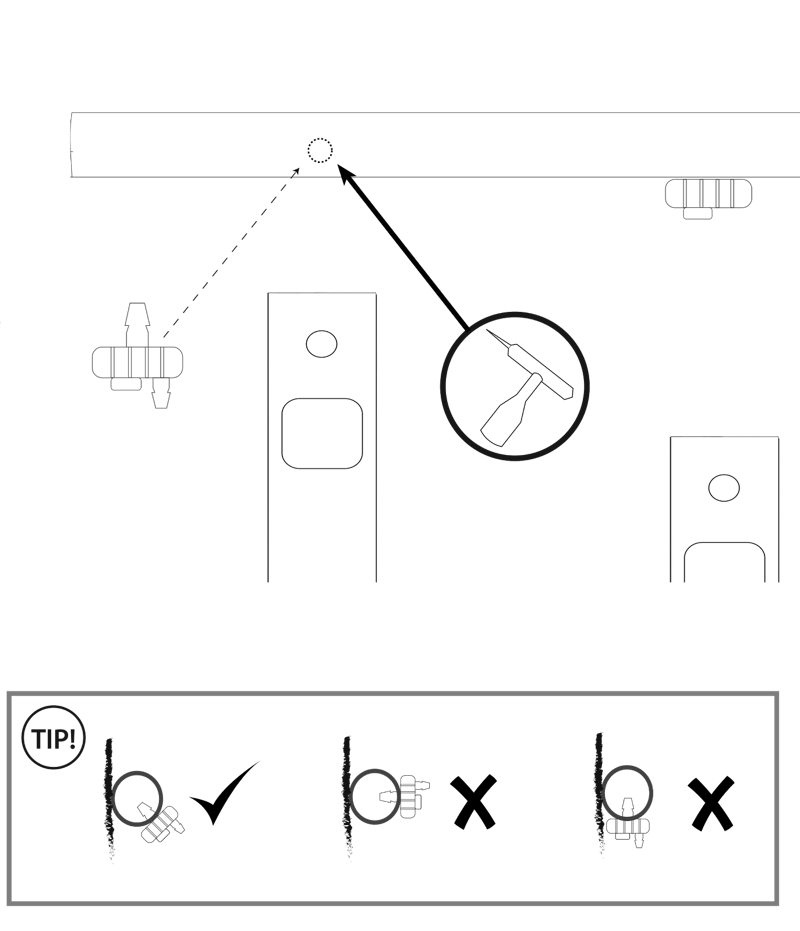
Step 11 | Install drippers
Punch holes in the pipe above the rails. Install the dripper and make sure it’s inserted at a 45º downward angle.
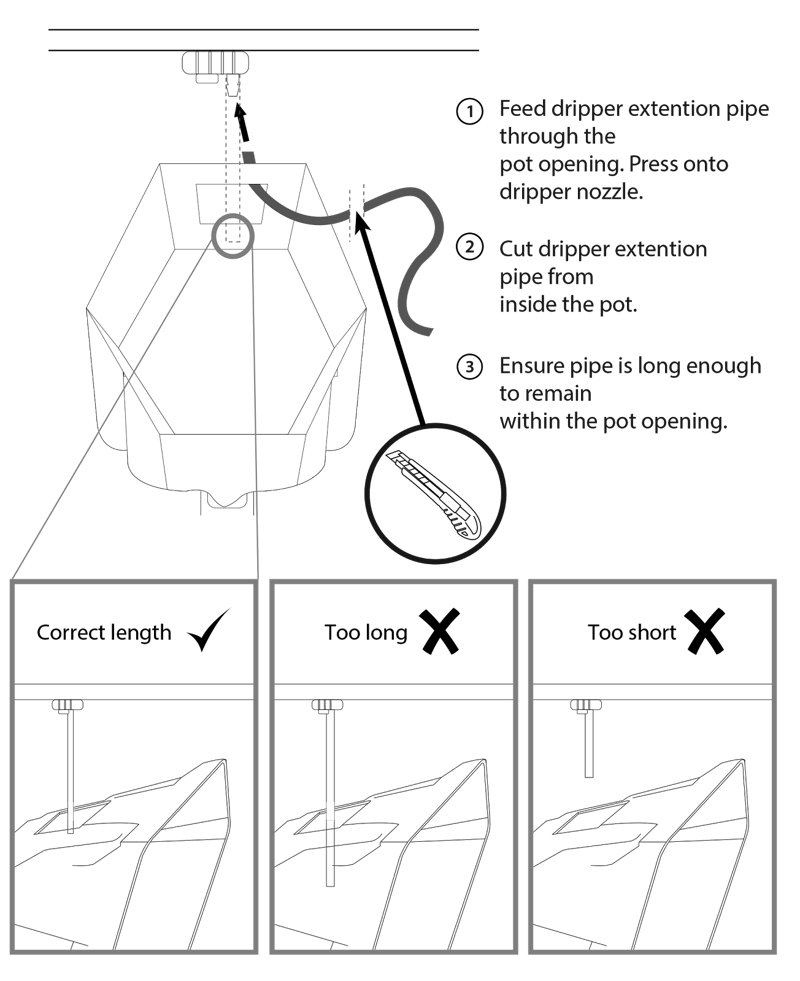
Step 12 | Extend drippers
Extend the dripper and insert it into the pot.
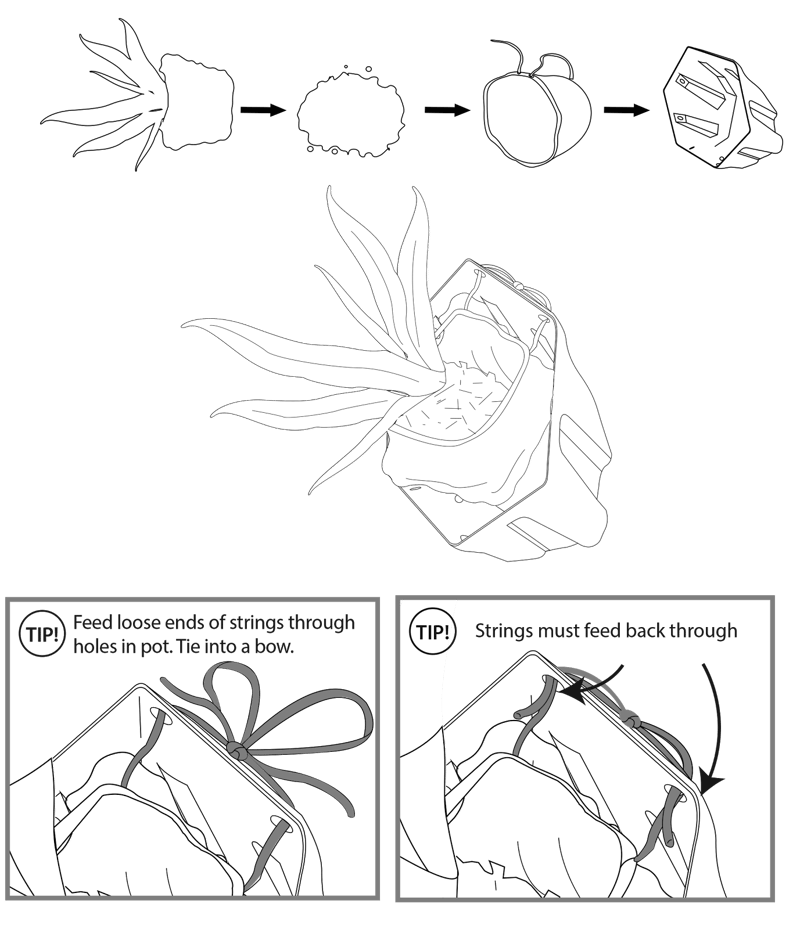
Step 13 | Plant your seedlings
Transplant your seedlings from their grow pots, in to the planter bags. Tie each bag into a hex pot.
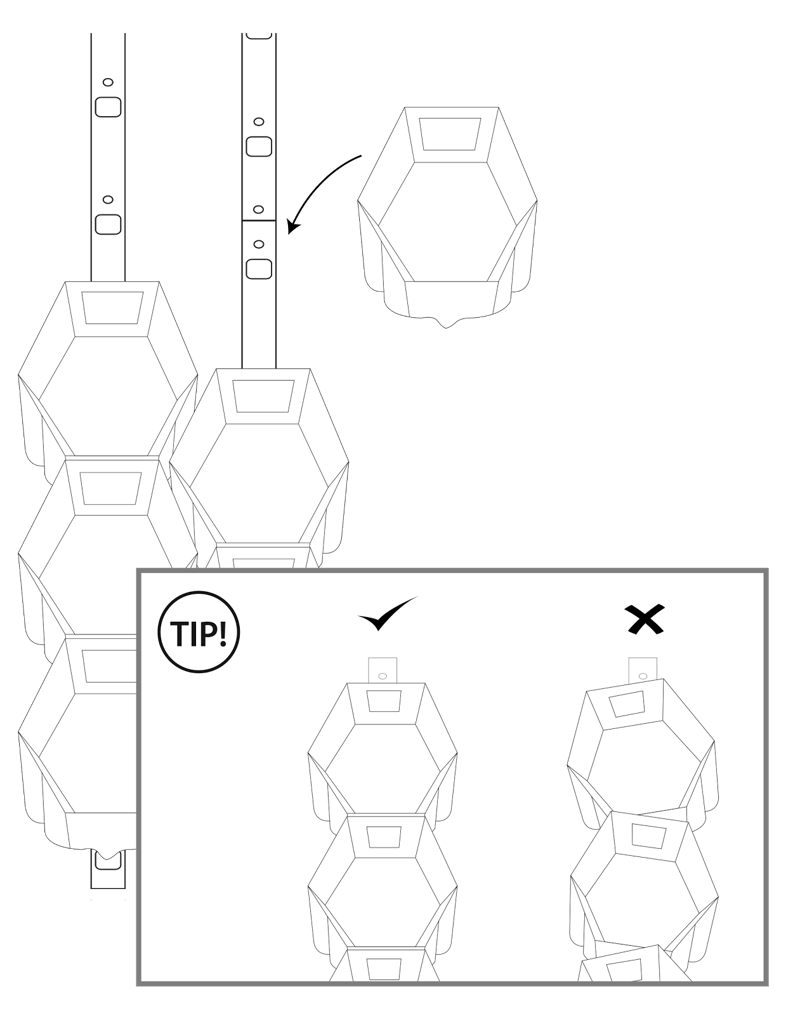
Step 14 | Pot installation
Clip the pots onto the rails and ensure they’re all properly aligned. It’s easier to load pots from bottom up.
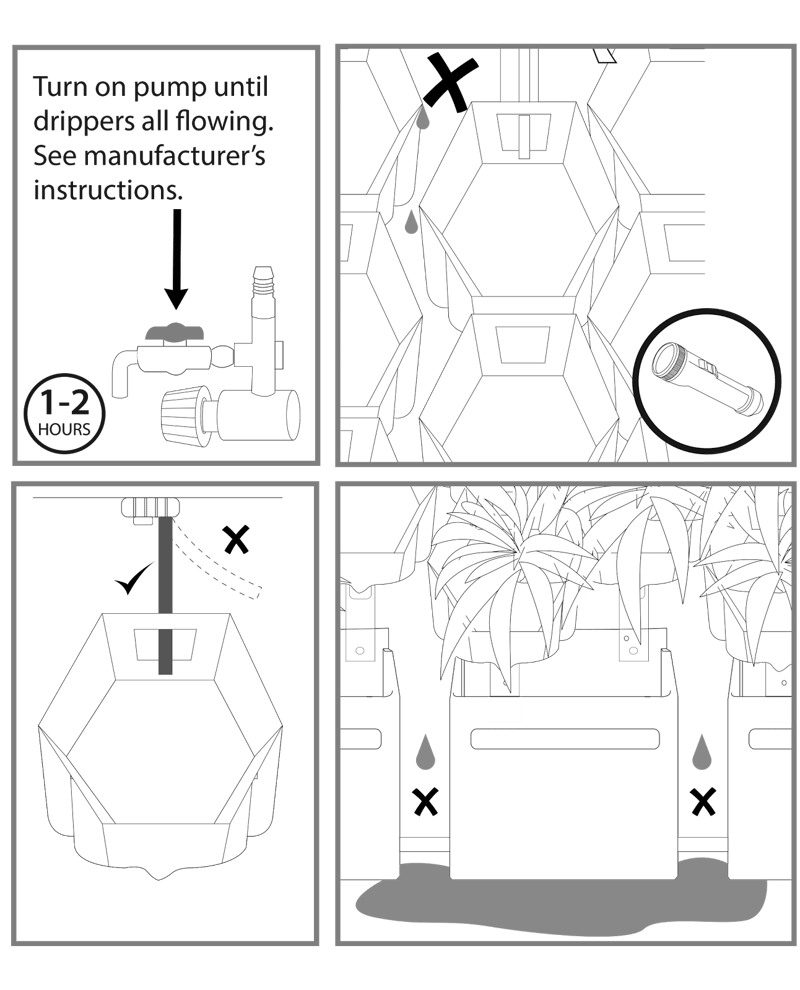
Step 15 | Test the Irrigation System
Check that all the drippers are inserted correctly into the pots. Test run the irrigation system for 1 to 2 hours and look out for leaks.
Once you’re sure the irrigation system is working properly, your green wall is complete. As you can see, the GrowUp system is designed to be user-friendly, and is a great starter kit for a first-time vertical garden enthusiast.